6 Stunning Tools to Add Clouds to Photo
| Features | Apowersoft Online Background Eraser | Pizap | Apowersoft Background Eraser | PicsArt | PhotoPad | PhotoScissors |
|---|---|---|---|---|---|---|
| Automatically and Precisely make transparent background | ||||||
| User-friendly interface | ||||||
| Provide multiple background templates | ||||||
| No ads while editing | ||||||
| Download with high quality | ||||||
| Download file free | ||||||
| Download photo without watermark |
Apowersoft Online Background Eraser (Online)
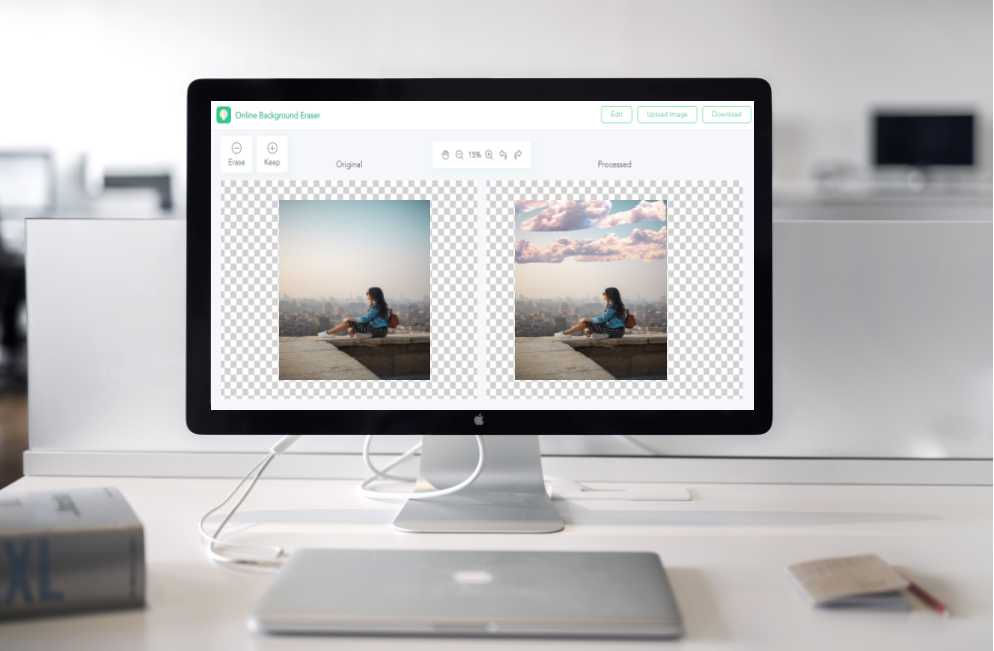
Apowersoft Online Background Eraser is a fully automatic background eraser tool with a simple and straightforward interface. If you intend to add clouds to photo online, it’s a great option for you. With its latest and advanced AI technology, it can recognize the objects accurately and remove your background automatically and instantly. So you don’t need any photo editing experience and skills. It suits for the beginners. Furthermore, you can manually edit by using the “Keep” and “Remove” tool to retain or erase the foreground or background. The before and after comparison is presented for you immediately. In addition, It provides three kinds of background templates, solid color background, elaborate templates, and custom templates. You can upload any photo as your background if you want. If you want to learn how to add clouds to a picture, below are the detailed instructions.
- Visit its official website and click “Upload Image ” on the right in the white square to upload the image you want to edit.

- It will automatically remove the background of your photo.
- Hit the “Erase” button to delete the background or use the “Keep” button to keep the object in case you are not satisfied with the area it removed.
- The tools in the upper middle part are to help you move, undo, and zoom in and out the photo.
- Once satisfied, click “Edit” at the upper right.

- Tap “Change Background” then “Image” to upload cloud backgrounds from your gallery.
- Moreover you can crop and move your photo on the left if you want.
- Finally click the “Download” button below to save your edited photo on your device.

Pizap (Online)
If you want to add clouds to photo online, Pizap is a fun and easy to learn photo editor. It doesn’t have endless menus, complicated layering options, and stuff that only professional photographers would use. With its simple interface, you’ll edit your photo quickly and will save you a lot of time. You make a line to select the object you want to keep and it will remove the unwanted area automatically. What’s more, it not only provides basic functions like, crop, rotate, brightness cutout, etc. but also includes stickers, filters, effects, texts, frames, and many more. Here are the steps to guide you on how to add clouds to a picture.
- Go to its official website and click “Edit Photo” on the top to upload your image.

- It provides several ways to import your photo, such as computer, Facebook, Free Stock Images, etc. Once uploaded, Click “Cut Out” to erase your photo background.

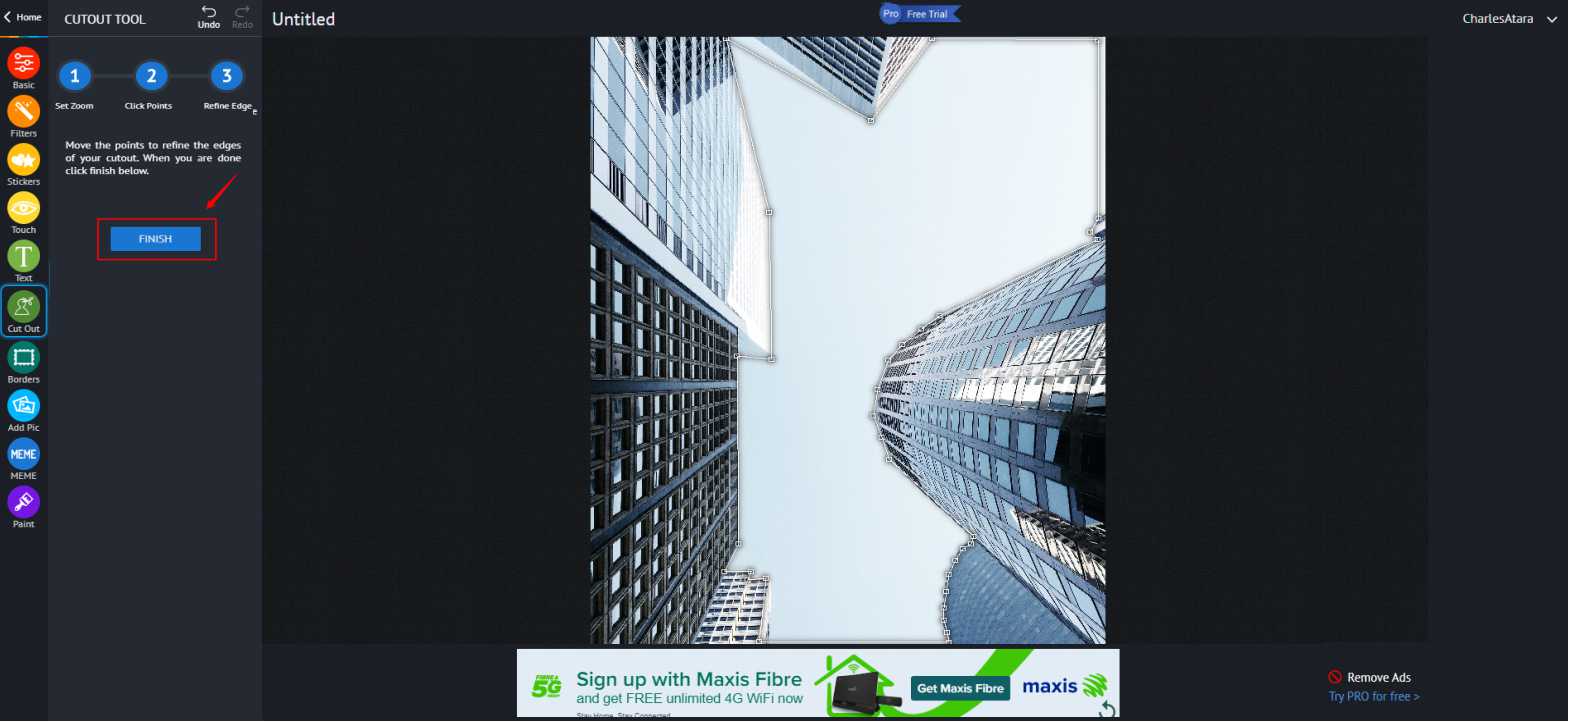
- Three steps to cut out. First crop the object you want to edit.
- Second, using its Clicking Points to connect the dots around the edge of your shape. Make sure to go all the way around back to the first point to complete the shape.
- The last step is to move points to refine the edges of your cutout.
- If you are satisfied with the outcome, click “Finish” on the left.
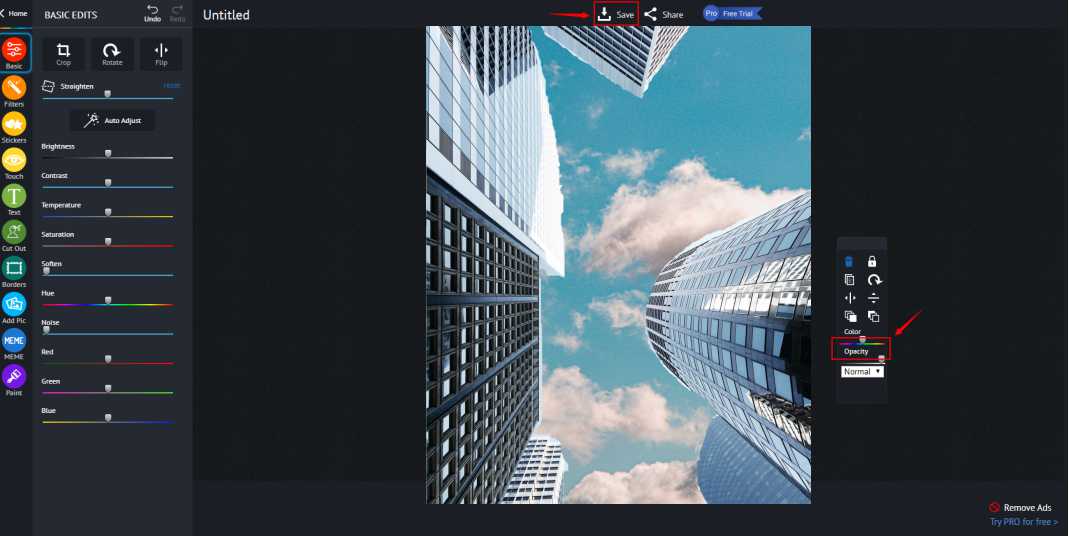
- Then click “Add Pic” on the left in the toolbar to add clouds to photo. You can manually adjust the opacity to fit your photo.
- Finally, click “Save” on the top to download your photo.
Apowersoft Background Eraser ( iOS and Android )
Apowersoft Background Eraser is one of the best photo background editor app that can work for both Android and iOS users. With this useful tool, you can remove your background with a single click. It will precisely and automatically separate the foreground from its background. Also it has three editing tools to help you tune your cutout. You can flip the object, make copies of the cutout, and zoom in and out the image. After you make the image background transparent, you can use this app to add clouds to photos. Once finished editing, this app supports all formats, like JPG, JPEG, PNG, BMP, TIF, and many more. You can directly download your photo or share your design on social media. Refer to the below to learn how to use this app.
- Go to the Play Store or APP Store to download and install the App on your mobile.
- Open the app Bg Remover and click “Remove Background” in the middle to import the photo.

- It will remove your background automatically. In case you need to adjust, click “Optimize manually” below on the left.
- If you are contented, click “Change Background” then “Plus” sign to add clouds to photo you want to as the new background of your photo.
- You can also crop, flip, and clone your objects to make your photo more amazing.
- Once done, click “Save” at the top right corner. Your edited file will be autosaved and you can share it directly on social media.

PicsArt ( iOS and Android )
PicsArt is an awesome app to add clouds to photos. Users can use this app to take and edit photos, then share them on PicsArt community or other social media. This app includes a number of features. It allows you to change photo background automatically and manually, make collages, add stickers and text, adjust the saturation, add filters, and many more. However, the pop-up ads might annoy you sometimes. Other than that, PicsArt is a powerful photo editing tool that you should have a try. What’s more, this app is available for both iOS and Android. To learn how to add clouds to a picture using this app, check out below.
- Download it on the Play Store or App Store, and install it. Then click the “Plus” sign below in the middle to import your image.
- Slide to the left in the toolbar and tap the “Cutout” sign below. It will roughly cutout the object.
- Use the “Brush” icon to keep the object, and “Eraser” icon to remove the unwanted part.
- Click “Save” at the upper right corner to further edited.

- Slide to the left below in the toolbar and find the “Draw” icon. Enter its page, tap the “Add picture” icon to use this app to add clouds to photo.
- After you upload your clouds photo, adjust its size to fit your objects.
- Once finished, click the “Tick ” icon and “Save” on the top right corner to download your photo.

PhotoPad (Windows and Mac)
Whether you are professional or beginners, PhotoPad is a great option for you to edit your image and learn how to add clouds to a picture. It supports all kinds of popular image formats. It includes countless tools and features as you need. You can use its Background tool to replace the background in your photos with transparency, color, or another image. Also, it provides the Straighten tool to fix the tilted horizon or a crooked photo. Last but not least, you can add effects, text, frames, etc. to make your photo more attractive. Some pro features are unavailable unless you sign up and purchase it. But you’ll have a 7-day free trial. Follow the simple steps below.
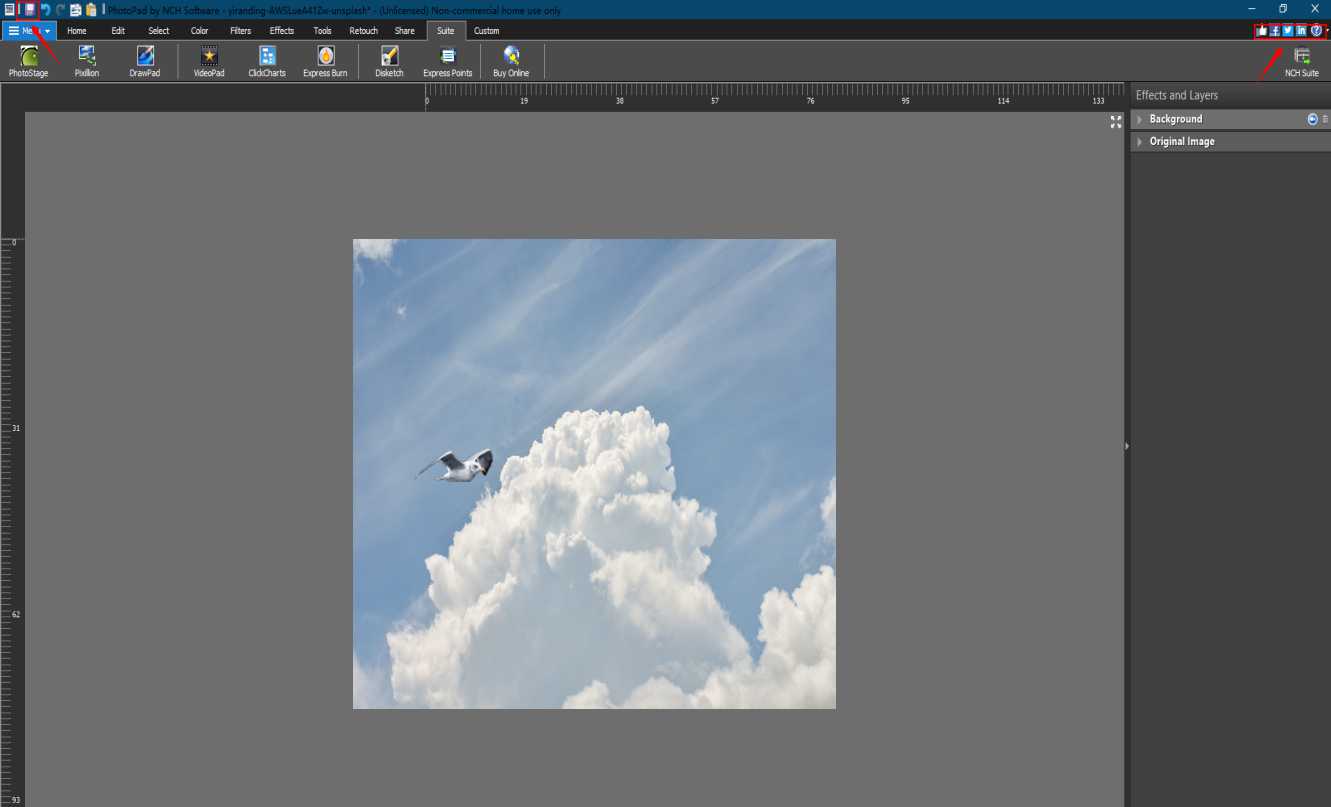
- Go to your favorite browser and download this software. Then install and open it. Click “Open” at the top right corner to import the photo you want to edit.

- Then click “Select” on the top in the toolbar to select the area you want to keep in order to add clouds to photo.
- You can use different shapes to select depends on your object. Once finished, click “Crop selected” to keep the object.

- Next click “Tools” on the top and choose “background”. You can upload your clouds photo on the right. After that, it will automatically be your new background.

- If you are pleased with the edited file, click the “Save” icon on the top left corner. Or you can directly share it on social media by clicking different icons on the upper right corner.
PhotoScissors (Windows and Mac)
PhotoScissors is a useful photo editor to add clouds to photo. It will save you a lot of time when you need to cut out an object from your photo. You don’t need any specific skills or professional photo editing experience. Just upload the image, it will remove your photo background automatically with a transparent background. It also can easily handle complicated objects like hair. In case you are not contented with the result, you can use “Brush” to further edit. Then you can easily change your background with solid color or your own background image. It supports PNG and JPG graphic formats. However, PhotoScissors is not free but offers 5 trails. Rely on the steps below to learn how to add clouds to a picture.
- Head on its official website and download the software. Next launch it. Click the “File” icon to open the image from your computer.

- Brush the clouds you want to add to your photo by using the tool on the left. Then click the “Background” icon on the right and hit the “Image” to import your photo as background.
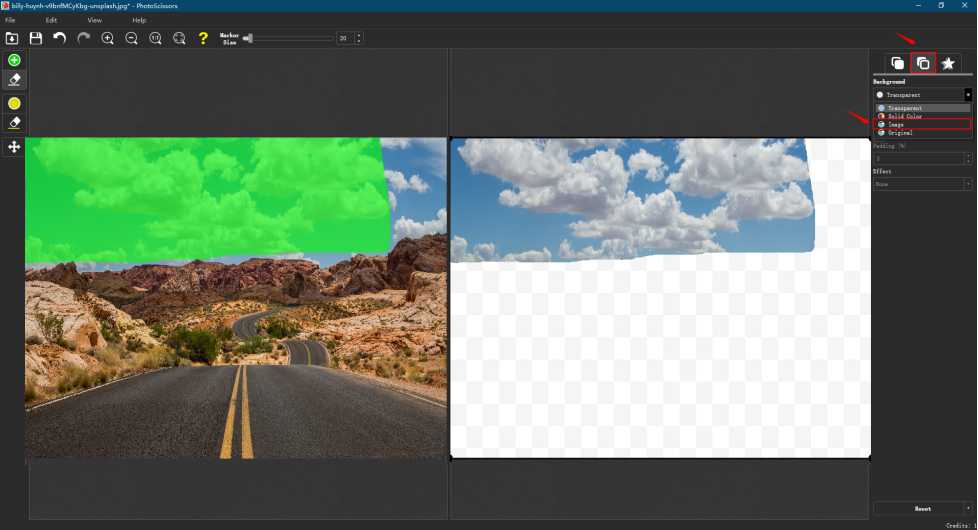
- You can continue to brush the clouds to fit your photo. Once finished, click the “Save” icon on the upper left to download your photo.

Conclusion
Adding clouds to the photo can make your photo more stunning, and it might amaze your followers when you post your edited photo to social media. We listed 6 marvelous tools to help you easily and quickly add clouds to photo. You can have a try and see which one suits you best.


Leave a Comment